

Easy Pear Tart
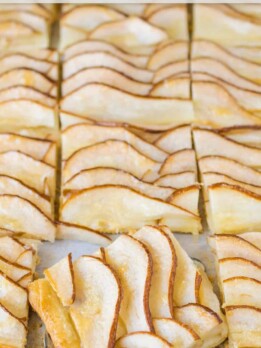
When you’re craving a sweet finish that feels elegant without putting in hours of pastry work, simply turn to my Easy Pear Tart! Sliced fruit cascades over a buttery, flaky crust – whether homemade or puff pastry – and a quick brush of warm jam gives it that glossy, professional finish.

Table of Contents
Why You’ll Love this Recipe
- A Simple Dessert for Any Occasion: This recipe comes together in minutes with basic pantry staples and sweet fresh pears, making it the ultimate stress-free treat after a busy weeknight or a big holiday meal.
- Effortless & Elegant: Free-form tarts give you that bakery-worthy look without the stress of perfection or fancy tart pans.
- Light After Heavy Meals: Perfect for Thanksgiving or dinner parties when you want something sweet that won’t leave you feeling overly full.
- Feeds a Crowd: Slices cleanly into 12 portions, making it ideal for entertaining.
What Jam Works Best for Pear Tart?
You can use your favorite jam to give this tart a gorgeous finish and flavor, whether you choose pear, apricot, peach, or apple jelly. Warm the jam slightly in the microwave for 10–15 seconds so it brushes on smoothly and gives your baked fruit that stunning, bakery-style shine. Stay away from strawberry or raspberry, or the tart will take on an unwanted shade of red and leave visible seeds behind.

Can You Use Store Bought Puff Pastry?
While the recipe below features my buttery homemade crust, you can easily swap it for a sheet of store-bought puff pastry if you are short on time. Just thaw it according to the package directions, roll it out slightly on a floured surface, and top it with the sliced fruit and butter just as you would the from-scratch version.
Tips for the Best Pear Tart
- No Tart Pan Needed: Skip the fancy dish! Roll your crust into a rectangle directly on parchment paper, arrange your fruit, and slide the parchment straight onto a large rimmed baking sheet.
- Crust Options: While a homemade pastry dough is fantastic, you can also use your favorite store-bought pie crust or homemade pie dough recipe to save time. (If you love baking from scratch, check out my go-to guide for making the ultimate flaky pie crust).
- Keep the Butter Cold: Use ice-cold butter for the crust – it creates steam pockets as it bakes, giving you those irresistibly flaky layers.
- Don’t Overwork the Dough: Mix just until the dough comes together. Less handling means a tender, melt-in-your-mouth pastry instead of a tough one.
- Chill Before Baking: Pop the assembled tart in the fridge for 10–15 minutes right before it hits the oven to help the crust hold its beautiful rectangular shape.
- Pick Firm Fresh Pears: Go for fresh pears that yield slightly to pressure but are still firm (like Bartlett, Bosc, or Anjou) so the slices stay intact and hold their shape without turning to mush.
- Don’t Skip the Glaze: Brushing warmed preserves over the hot pears right out of the oven seals in juice and gives the tart that stunning shine.
- Serve It Warm: A warm slice paired with a cold scoop of French vanilla ice cream or fresh whipped cream is pure culinary perfection!

Seasonal Fruit Variations
The beauty of a basic tart crust is its versatility. Swap out the pears depending on what’s fresh at the market:
- Autumn/Winter: Sweet apples (like Honeycrisp or Granny Smith) or fresh figs.
- Spring/Summer: Sliced peaches, plums, nectarines, or a mix of fresh berries.
How to Store and Reheat Leftovers
If you happen to have any leftover pear tart, it stores and reheats beautifully:
- Storing: Store leftovers in an airtight container in the refrigerator for up to 3 days.
- Reheating: To crisp the crust back up, warm your leftover pear tart in a 350°F (175°C) oven or toaster oven for 5 to 8 minutes. Avoid the microwave as it will make the flaky crust soft and soggy.
More Pear Recipes to Try Next
If you still have extra pears sitting on the counter, put them to work in these reader favorites:
- Pear and Goat Cheese Quiche: A savory, elegant spin for breakfast or brunch featuring tender fruit and creamy cheese baked right into a golden crust.
- Pear and Crispy Prosciutto Salad: A vibrant mix tossed with a bright balsamic ginger dressing that balances sweet fruit with savory, salty crunch.
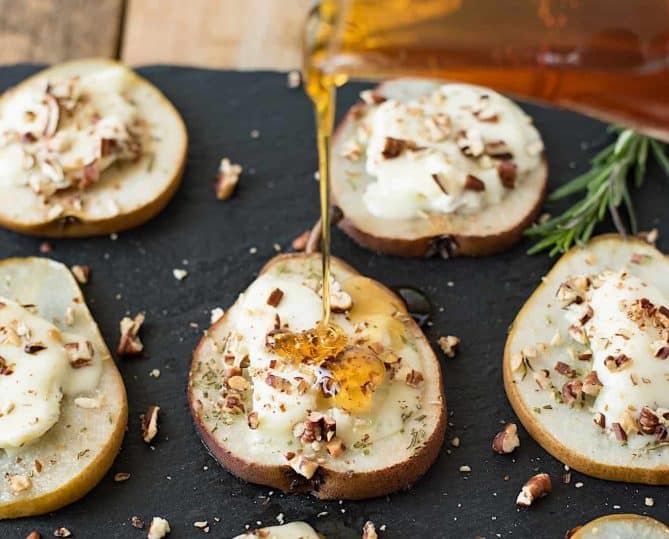
- Baked Pears with Goat Cheese, Pecans and Honey: A warm, low-effort dessert that comes together in minutes with minimal cleanup.



Easy Pear Tart

Video
Ingredients
For the Pastry:
- 2 cups (300 grams) all-purpose or plain flour , plus extra for rolling out dough
- Small pinch of salt
- 2 teaspoons (8 grams) granulated sugar
- ¾ cup (175 grams) unsalted butter, cut into small cubes
- ½ cup (120 ml) cold water
For the Topping:
- 4-6 firm, ripe pears, depending on size
- 2 tablespoons (30 grams) unsalted butter, melted
- 2 tablespoons (30 ml) smooth apricot, peach, or pear jam or clear fruit preserves/jelly
- 1 teaspoon (4 grams) granulated sugar
Instructions
To Make the Pastry in a Food Processor:
- Add the flour, salt, sugar, and butter to the bowl. Pulse until the butter is combined into small crumbs. With the processor running, drizzle in the cold water until it starts to clump and come together.
To Make the Pastry by Hand:
- Add the flour, salt, sugar, and butter to a large bowl. Using your fingertips or a pastry cutter, rub the butter into the flour until it resembles breadcrumbs. Drizzle in the water and mix with a fork until it starts to hold together when pressed in your hand. You may not need all of the water.
Puff Pastry Shortcut:
- If using store-bought puff pastry instead of homemade, skip the mixing steps above, unfold your thawed pastry sheet, and roll it out slightly on a floured surface to roughly 11×15-inches (28×38 cm). Skip to step 5.
- Transfer the homemade dough to a floured surface and shape into a flattened rectangle. Cover with plastic wrap and refrigerate for 15 minutes.
- Line a large baking sheet with parchment paper. Preheat your oven to 400°F (200°C).
- On a lightly floured surface, roll the dough into an 11×15-inch rectangle. Roll the pastry loosely over your rolling pin, transfer it to the prepared baking sheet, and pop it back in the fridge to chill briefly.
Make the Topping:
- Slice the pears in half lengthwise, remove seeds and cut them into ¼-inch thick slices. Arrange the pear slices neatly on the pastry leaving a border.
- Brush the exposed pastry edges and the sliced pears with melted butter, then sprinkle evenly with the sugar.
- Bake for 30 minutes until the pastry is golden. Rotate halfway through for even browning. Remove from the oven.
- Warm the jam in a microwave-safe or in a small pan dish for 20 seconds until runny, then gently brush it all over the warm pears and pastry for a glossy finish.
- Serve warm or at room temperature.
Great recipe and so easy for a non-baker…I used the “by hand ” method for the dough and it worked! I’ll check out your others!
Thank you so much for the feedback. I’m happy you enjoyed the tart.
Oh my word, just made this….I used apple butter instead of preserves, and that little bit of cinnamon put it over the top! I absolutely adore pears and this was perfect! Thanks!
I’m so happy you enjoyed the tart and I love the idea of the apple butter, I’ll give that a try.
So easy to make and ever so tasty – thanks for this recipe.
Thank you so much for the feedback, I’m glad you enjoyed the tart.
Well I was nervous to make this because it looks like it came from a bakery. But your instructions are easy to follow and it’s so pretty and delicious! Thank you.
I’m so glad you overcame your nerves and made the tart. Thank you so much for sharing your experience.
I have one in the oven and smells amazing. I didn’t have ham or preserves so I used honey
I’m sure the honey worked fine. Hope you enjoyed it.
I am a diabetic, can I substitute Splenda for the sugar?
Hi Lisa, yes, I think this would work out fine. I’ve had success with monkfruit sugar as well.
I love when something looks super fancy and decadent but in reality it is so easy to make. Thanks for sharing this one!
Gorgeously simple, Janette. I recently ‘discovered’ making pastry in a food processor and you’re right, it’s so easy!
This would be a lovely quick dessert to serve to guests, and I can think of so many variations.
Love pears! Looks gorgeous! Pinned!
Hooray for pear season! Pears are my all-time favorite fruit – I seriously can’t get enough of them! So when I saw this pear tart I had to wipe the drool off of my computer. This looks truly phenomenal, Janette!
Oooh, this does look easy! And so delicious!
Move over pumpkin pie ~ this is absolutely stunning, Janette!
Beautiful recipe. I bet the pears taste terrific all roasted in the oven like this. Mmm…. perfect for Fall:)
This is how I like my dessert– gorgeous and easy. Love this– I’ll have to pick up some puff pastry next time I’m at the store!
This really is my kind of dessert – a little pastry and fruit – not a lot of sugar! Well done!
Such a beautiful dish, yet so simple to make! Utterly perfect!
This is one of my favorite fall desserts. I have a pear tart recipe that uses honey and rosemary and it is a fan and family favorite. Perfect way to celebrate the changing of the seasons.
Beautifully executed! I love peach and apricot added. All favorites of mine. Thanks!