Easy Chocolate Shards/Bark
Making Easy Chocolate Shards/Bark is simpler than it sounds — all you need is melted chocolate! Use milk, dark, or white chocolate (or swirl all three), spread it onto parchment paper, roll it up, chill until firm, and snap into gorgeous, jagged pieces perfect for topping cakes, cupcakes, or holiday treats.

Table of contents

How to use chocolate shards
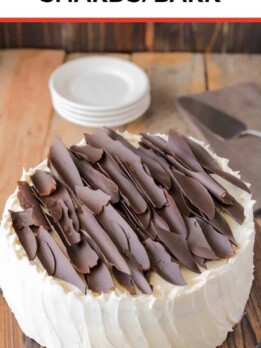
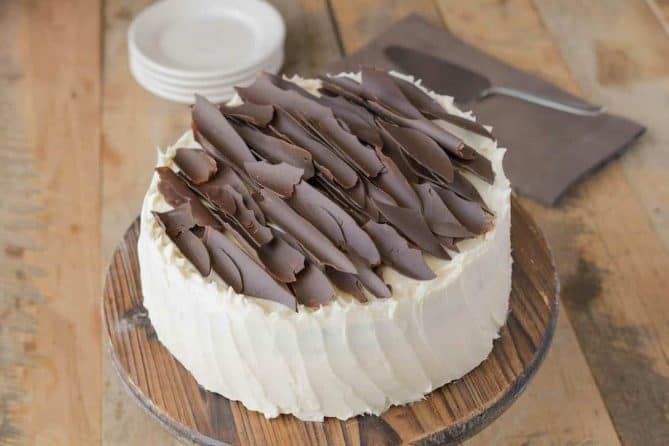
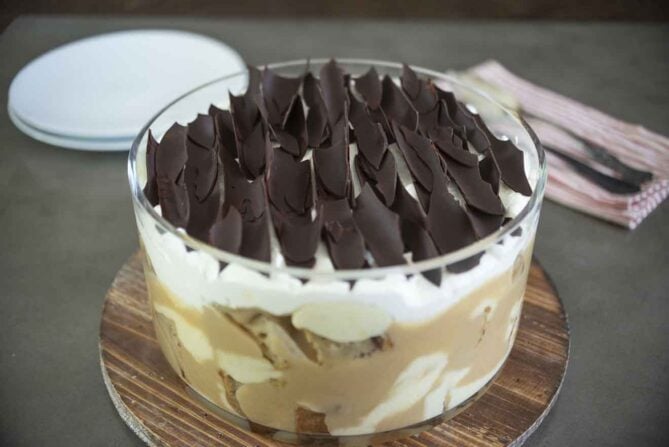
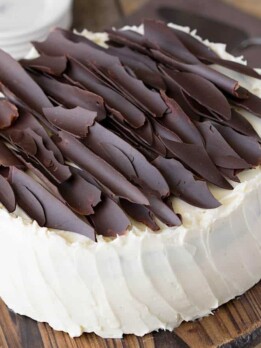
I first created these shards when I was developing my Irish Chocolate Cake with Baileys Buttercream Frosting and my Christmas Yule Log (all pictured above). I’ve since used them to top my Sticky Toffee Pudding Trifle, and they add the perfect finishing touch every time.
In the past, to achieve the effect of chocolate bark on the log, I simply used a fork to draw lines in the chocolate covering the log. A simple and very rudimentary method taught in any cooking class, but I was looking for something more realistic and theses shards add a dramatic 3-D effect.
My friend Olivia from Liv for Cake, decorated her Black Forest Cake with dark chocolate shards and also made stunning red and white ones emulating candy canes for her White Chocolate Candy Cane Cake (pictured below) very festive for Christmas!

Tempering Chocolate for Shard/Bark
Tempering isn’t required for this recipe, but you can do it if you like. Tempered chocolate has a glossy finish, but I prefer the matte look, so I don’t temper mine. It also breaks too cleanly when tempered, and I like those jagged edges that look more natural.
Keep this in mind if you choose to temper: it makes the chocolate easier to handle and prevents it from melting in your hand, while also stabilizing it and giving it that shiny, polished finish.
What is tempering chocolate?
Tempering is the slow heating of chocolate to the melted stage, then cooling it. This allows the fat molecules to crystallize evenly, resulting in a glossy finish. I prefer the shards with a matte finish, so whether you temper or not is up to you.

Ttips for tempering chocolate:
Different chocolate needs to be heated to different temperatures.
Dark Chocolate Tempering Temperature
113°F/45°C. Cool to 80°F/27°C, reheat to 89°F/32°C.
Milk Chocolate Tempering Temperature
113°F/45°C. Cool to 79°F/26°C, reheat to 84°F/29°C.
White Chocolate Tempering Temperature
104°F/40°C. Cool to 77°F/25°C, reheat to 82°F/28°C.
How to easily temper chocolate
There are three ways to temper chocolate: using a double boiler, direct heat in a pan, or in the microwave. The most reliable method is using a bain marie—a metal or glass bowl resting comfortably over a pan of simmering water.
Monitoring the temperature is the most important key. The chocolate should never go above 122°F/50°C, as it can seize or scorch.
Start with a heatproof bowl (metal or glass) placed over a small saucepan. Fill the pan with enough water so that it does not touch the bottom of the bowl.
Add two-thirds of the chocolate, cut into chunks, and bring the water to a gentle simmer—not a boil. Stir often. You want the chocolate to melt slowly. Monitor the temperature using a candy thermometer.
Once the chocolate reaches the proper temperature (see tempering chart above), remove the bowl from the heat and add the remaining chocolate. Stir until melted and the temperature has reduced (refer to the chart).
Return the bowl to the heat and warm the chocolate until it reaches its final temperature (see chart above). Your chocolate is now ready to use.
Chocolate shards step by step
So, let’s get to the step-by-step instructions for these Easy Chocolate Shards/Bark. There is a video tutorial in the recipe so you can see me in action as I make them.
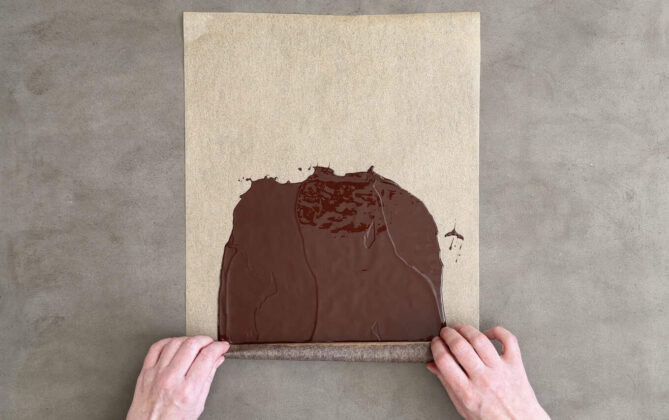
After melting the chocolate, spread the chocolate onto a large piece of parchment paper or wax paper, thinly. The size will depend on how large you want the shards.

Roll the paper over the melted chocolate. Making sure that only paper touches the chocolate, no chocolate to chocolate or it will stick together and fail. Refrigerate for at least 30 minutes (it can be kept for 2 days this way).
After the chocolate is set, unroll the paper (the chocolate will be stuck to the other side of the paper, this is normal). And break the shards in the sizes you need.

Stop untempered chocolate from melting
To prevent chocolate from melting after you’ve unrolled and created your shards (if you haven’t tempered it), keep the pieces refrigerated as you work. You can also dip your hands in cold water to keep them cool while handling the chocolate.
Which chocolate is best for shards?
I like to use regular eating chocolate, not baking chocolate. Eating chocolate melts smoothly and gives the best results. Avoid using chocolate chips — they’re formulated to hold their shape when baked, so they don’t melt as evenly and aren’t ideal for making shards.
Storing leftovers
Keep your chocolate shards in an airtight container to protect them from moisture and odors. Store them in a cool, dry place away from direct sunlight or heat. If your kitchen is warm, you can keep them in the refrigerator. Properly stored, they should stay perfect for up to 2 weeks.
Easy Chocolate Shards/Bark
Video
Ingredients
- 4 ounces (113 grams) dark, milk or white chocolate , see note
Instructions
- You can refer to the video below the recipe for more details.
Directions for using a bowl over a pan to melt chocolate:
- Use a glass or heatproof bowl that fits snugly over a small saucepan. Fill the pan with about 1–2 inches of water—just enough so that when the bowl is set on top, the bottom of the bowl does not touch the water.
- Heat the saucepan over medium-low and bring the water to a gentle simmer. Once simmering, reduce the heat to low so it stays at a light, steady steam rather than a hard boil.
- Add the chocolate to the bowl and place the bowl over the pan. The steam will gently warm the bottom of the bowl and begin melting the chocolate. Let it sit for a minute, then stir gently.
- When the chocolate is mostly melted, turn off the heat and carefully remove the bowl. The residual warmth of the bowl will finish melting it. Continue stirring until completely smooth. Avoid overheating.
- Place the saucepan over medium-low heat and bring the water to a gentle simmer. Once simmering, reduce the heat to low so the water maintains a light, steady steam, not a hard boil.
- When the chocolate is mostly melted, turn off the heat. The residual warmth of the bowl will finish melting it. Continue stirring until completely smooth. Avoid overheating.
Microwave chocolate melting method:
- Place the chocolate pieces in a microwave-safe bowl. Microwave for 20 seconds, then stir. Continue microwaving in 15–20 second intervals, stirring each time, until the chocolate is mostly melted. Then stir until fully smooth — the residual heat from the bowl and chocolate will finish the melting.
- Lift the edge of the parchment closest to you and gently roll it over the chocolate, making sure the chocolate doesn’t touch itself as you roll.
- Refrigerate for at least 30 minutes, then unroll. As you unroll, the chocolate may stick to the opposite side of the paper, this is ok, just unroll with the chocolate facing downward and it will naturally crack into pieces. Sometimes the chocolate unrolls in larger pieces; in that case, simply break it into shard size you want as you go.
- Remember, chocolate shards are meant to look rustic, so expect a mix of large and small pieces – they’ll break the way they want to.
Tips for success:
- After 30 minutes, test the chocolate by unrolling the paper slightly. If it’s still soft, refrigerate a bit longer.
- To speed things up, place it in the freezer for a few minutes.
- Keep the shards on the parchment to minimize handling and prevent melting.
- Store refrigerated until ready to use.
- Keep your hands cold before touching the shards (a quick dip in ice water helps) to keep them from melting.
Notes
You can double the amount of chocolate to make more.
I used Ghirardelli Baking chips for this one and followed your tips.I also watched the video. It turned out so well!! DO NOT SKIP the tempering part. It’s very important to temper your chocolate for higher chance of success. Having a thermometer is handy as well as monitoring the temperature. My bark had some “snap” when I tempered and then unrolled it from the parchment. Thank you for imparting your knowledge!
Since Ghirardelli chips are made with real cocoa butter, your decision to temper them was a good idea and the secret to your success. Thank you so much for watching the video and sharing your results.
I want to make sure I understand. It’s best not to use chocolate chips or the Ghirardelli melting wafers? Just a bar you would normally eat. C
I have never used with Ghiradelli melting wafers, but since they are made to stay melted for dips, I don’t think they would work. A chocolate bar what you would eat is best. Enjoy.
I did everything in your instructions, but when I unrolled the paper, it kind of just crumbled. I used baking chocolate instead of a chocolate bar (that’s what I had), would that be why?
I do believe it may have been the baking chocolate. This is why I recommend chocolate you would eat.
My bark turned out beautifully, thank you so much for sharing this!
I love to hear this, thank you for letting me know.
I love this technique! I made mini ones and topped chocolate cupcakes with them.
I’d love to see them. Thank you for sharing.
I was so happy with how these turned out (I was nervous at first about my own ability). I used them to decorate the top of a chocolate cake. Thank you
I’m so glad it worked out for you, thank you for sharing.
The chocolate stuck to the parchment paper. Did not work well at all
I’m sorry this did not work out for you. I may have not been set enough or it may have been the type of chocolate you used. Did you use baking chocolate or chocolate chips?
Thank you for the instructions on how to make chocolate shards. I was a little intimated but it worked out perfectly and I thrilled with my cake! Thanks!
I’m so happy my recipe worked out for you. Thank you for the feedback.
Hi
I tried making this
It keeps melting
What should I do please help
Can you be more specific? When are they melting?
Thanks for such a speedy reply.
While I’m lining it on the side of the cake.. it’s melting under my fingers.
Oh I see. What I recommend is, keeping your hands cold and touching the chocolate as little as possible. It’s more work, you could also keep putting the chocolate in the fridge or freezer to keep them really cold. I know this is difficult and maybe use tongs or something to handle them with. I hope this helps and the very best of luck.
The perfect and very pretty topping to a simple cheesecake. Thank you
You’re welcome
What kind of frosting do you find works best for the shards to stick to? I am making a tree stump and want to stick to the side.
Thank you!
Any frosting really that doesn’t dry and harden, cream cheese, butter frosting, chocolate ganache. You could also use melted chocolate as the ‘glue’ to stick the tree stump. Let me know if you have any more questions and I’d love to see your finished product when it’s done.
If i put the shards on top of my cakes, how long will its last? Lets say if i put it on to a glazed cake? Hope to see your reply 🙏🏻
Are you asking if they will they melt? They will not at room temperature (if it’s not too hot) they should last as long as the cake.
Is it possible to use a silicone mat instead of the parchment?
I have not tried this method with a silicone mat, but I don’t see why it should not work. Just make sure the mat does not try and unroll in the fridge.
What happens if you leave it in the fridge for more than two days? Just wondering as I’m trying to plan my prep work for a party
It should be fine rolled up in the refrigerator for a few days. You may want to wrap it in well in plastic wrap as chocolate can sometimes discolor a little and get a white look to it when refrigerated. I hope this helps.
Would like to see the shard making video again..Thanks
When you go back to the page (or refresh, the video will play again. Also at the end there is a countdown. If you click cancel, there is a replay button.
Hi Janette
Just love the bark shard recipe and instructions/video. They came out perfect, made some small and large, just perfect.
Thank you 😊
I’m so glad you like them. They are a lovely garnish for any dessert, thank you for the feedback.
Hi can this be done with foil
I haven’t tried it with foil, but I would say the results would not be the same. Foil doesn’t roll as easily as parchment paper and it may be difficult to unroll with the chocolate. I hope this helps.
I used foil to make a rough bark. Crinkled it up and put parchment on the bottom then spread out the chocolate. I did spray the foil just in case it would sick. Put the foil over the chocolate then roll it up. It came out so realistic. Loved it.
Thank you for sharing your tip, that is very helpful.
Hello! Love this tutorial with the exception of one thing. When you roll the parchment paper, the chocolate is concealed inward prior to refrigerating. When you are unrolling it in your video, the chocolate is outward. How is that possible? Not sure if you can understand what I am trying to say.
I completely understand what you are seeing. What happens is, the chocolate has now dried to the other side of the paper that is was spread on because the paper was rolled onto it. If you make it, you will see how this happens. I hope this helps 🙂