British Jelly and Ice Cream (A Classic Retro Dessert)
If you grew up in the UK, the mere mention of British Jelly and Ice Cream (A Classic Retro Dessert) instantly transports you back to plastic tablecloths, party games, childhood birthdays, and school meals. For my friends in the US, ‘jelly’ is what you know as Jell-O. Either way, I gave this nostalgic childhood favorite an elegant upgrade by making the jelly completely from scratch using fresh, juicy strawberries. It is simple, vibrant, and proof that some of the best desserts only require two humble ingredients.

Table of Contents
- The Upgrade: Posh Jelly and Ice Cream
- A British Tradition (With a New York Connection)
- Why This is a British Icon
- 2 Ways to Serve Jelly and Ice Cream
- Gelatin vs. Gelatine: What’s in a Name?
- 3-Ingredient Jelly/Jello
- Tips for Success
- Naturally Sweetened and Low-Glycemic Options
- A Retro Mashup: A Knickerbocker Glory Upgrade
The Upgrade: Posh Jelly and Ice Cream
Unlike the boxed packets from our childhood birthdays, this elevated version is crafted from real, juicy strawberries. It is beautifully fresh, completely customizable, and works just as well with fresh raspberries, blueberries, or whatever fruit juice you happen to have on hand.
A British Tradition (With a New York Connection)
I always thought this was a strictly British thing, but my husband told me he grew up eating the exact same combination over on Long Island, New York. Who knew?
Why This is a British Icon
You might wonder how a dessert this simple became a national treasure. In the UK, it isn’t just a sweet treat – it is a cultural staple. Whether served at a sunny backyard summer gathering or a festive birthday bash, this classic pairing has been putting smiles on faces for generations. It strikes the perfect balance of fruity, creamy, cool, and comforting. While the childhood version relied on boxed packets, making a homemade version elevates it into something special.
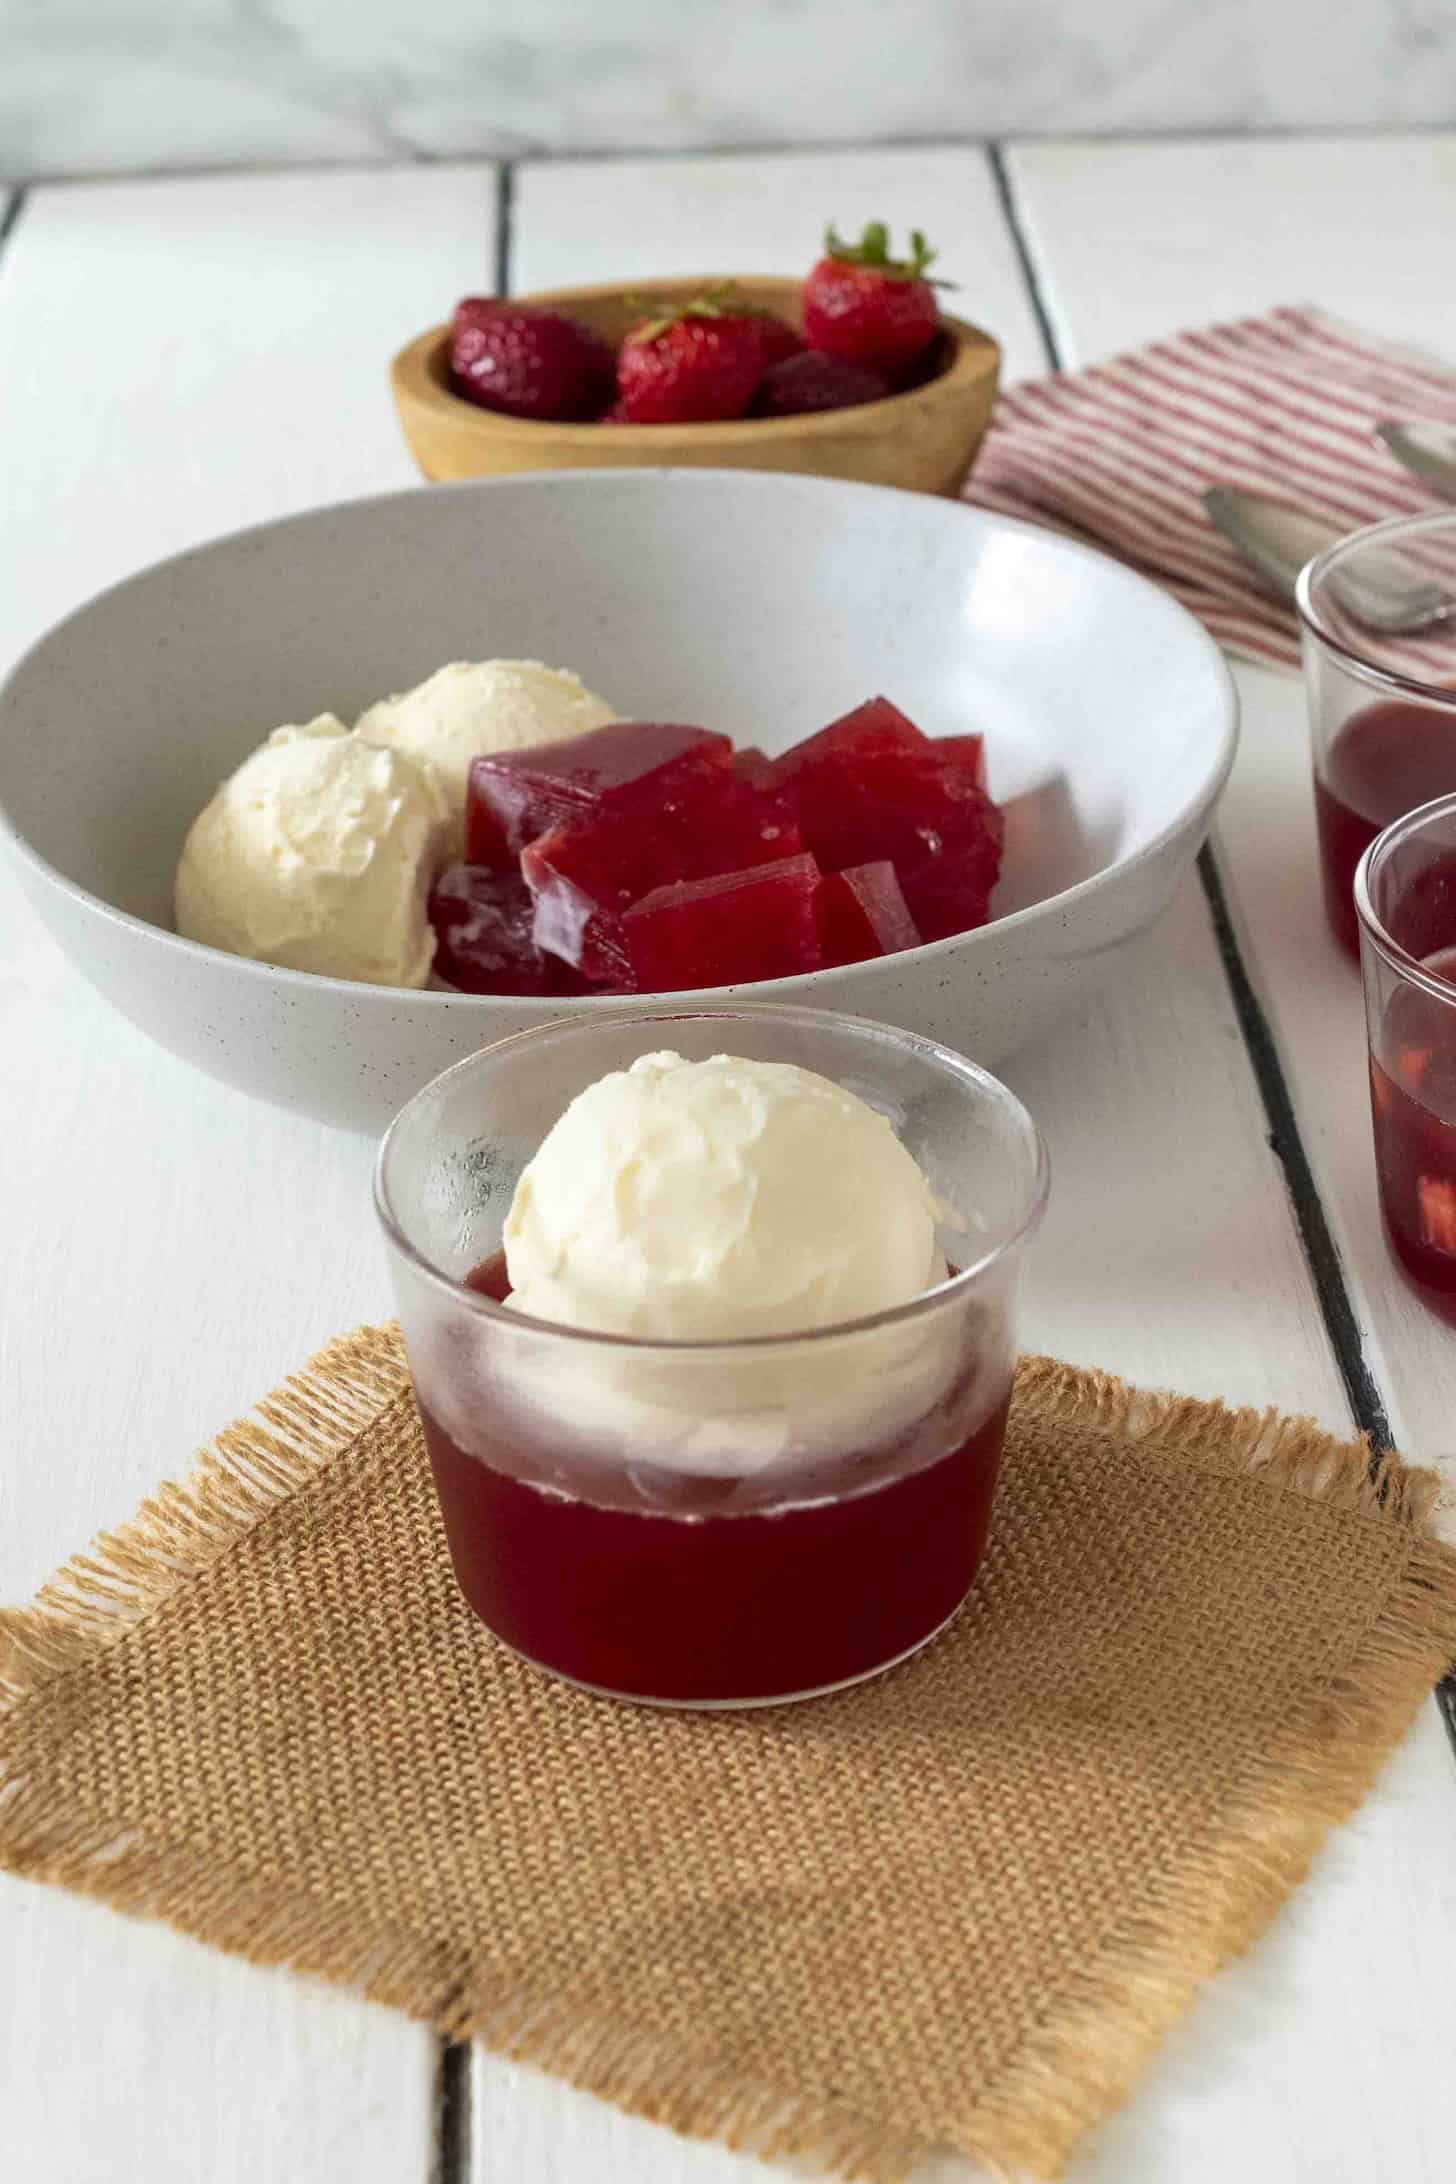
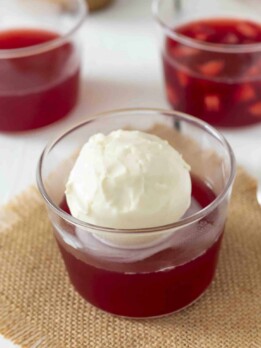
2 Ways to Serve Jelly and Ice Cream
When it is time to bring it to the table, it doesn’t have to be fancy – but you can. Whether you want an elegant dinner party showpiece or a casual family throwback, I’ve given you two easy options. See both in the picture above.
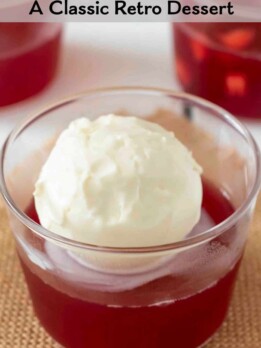
- The Elegant Way: Individual Dessert Cups:
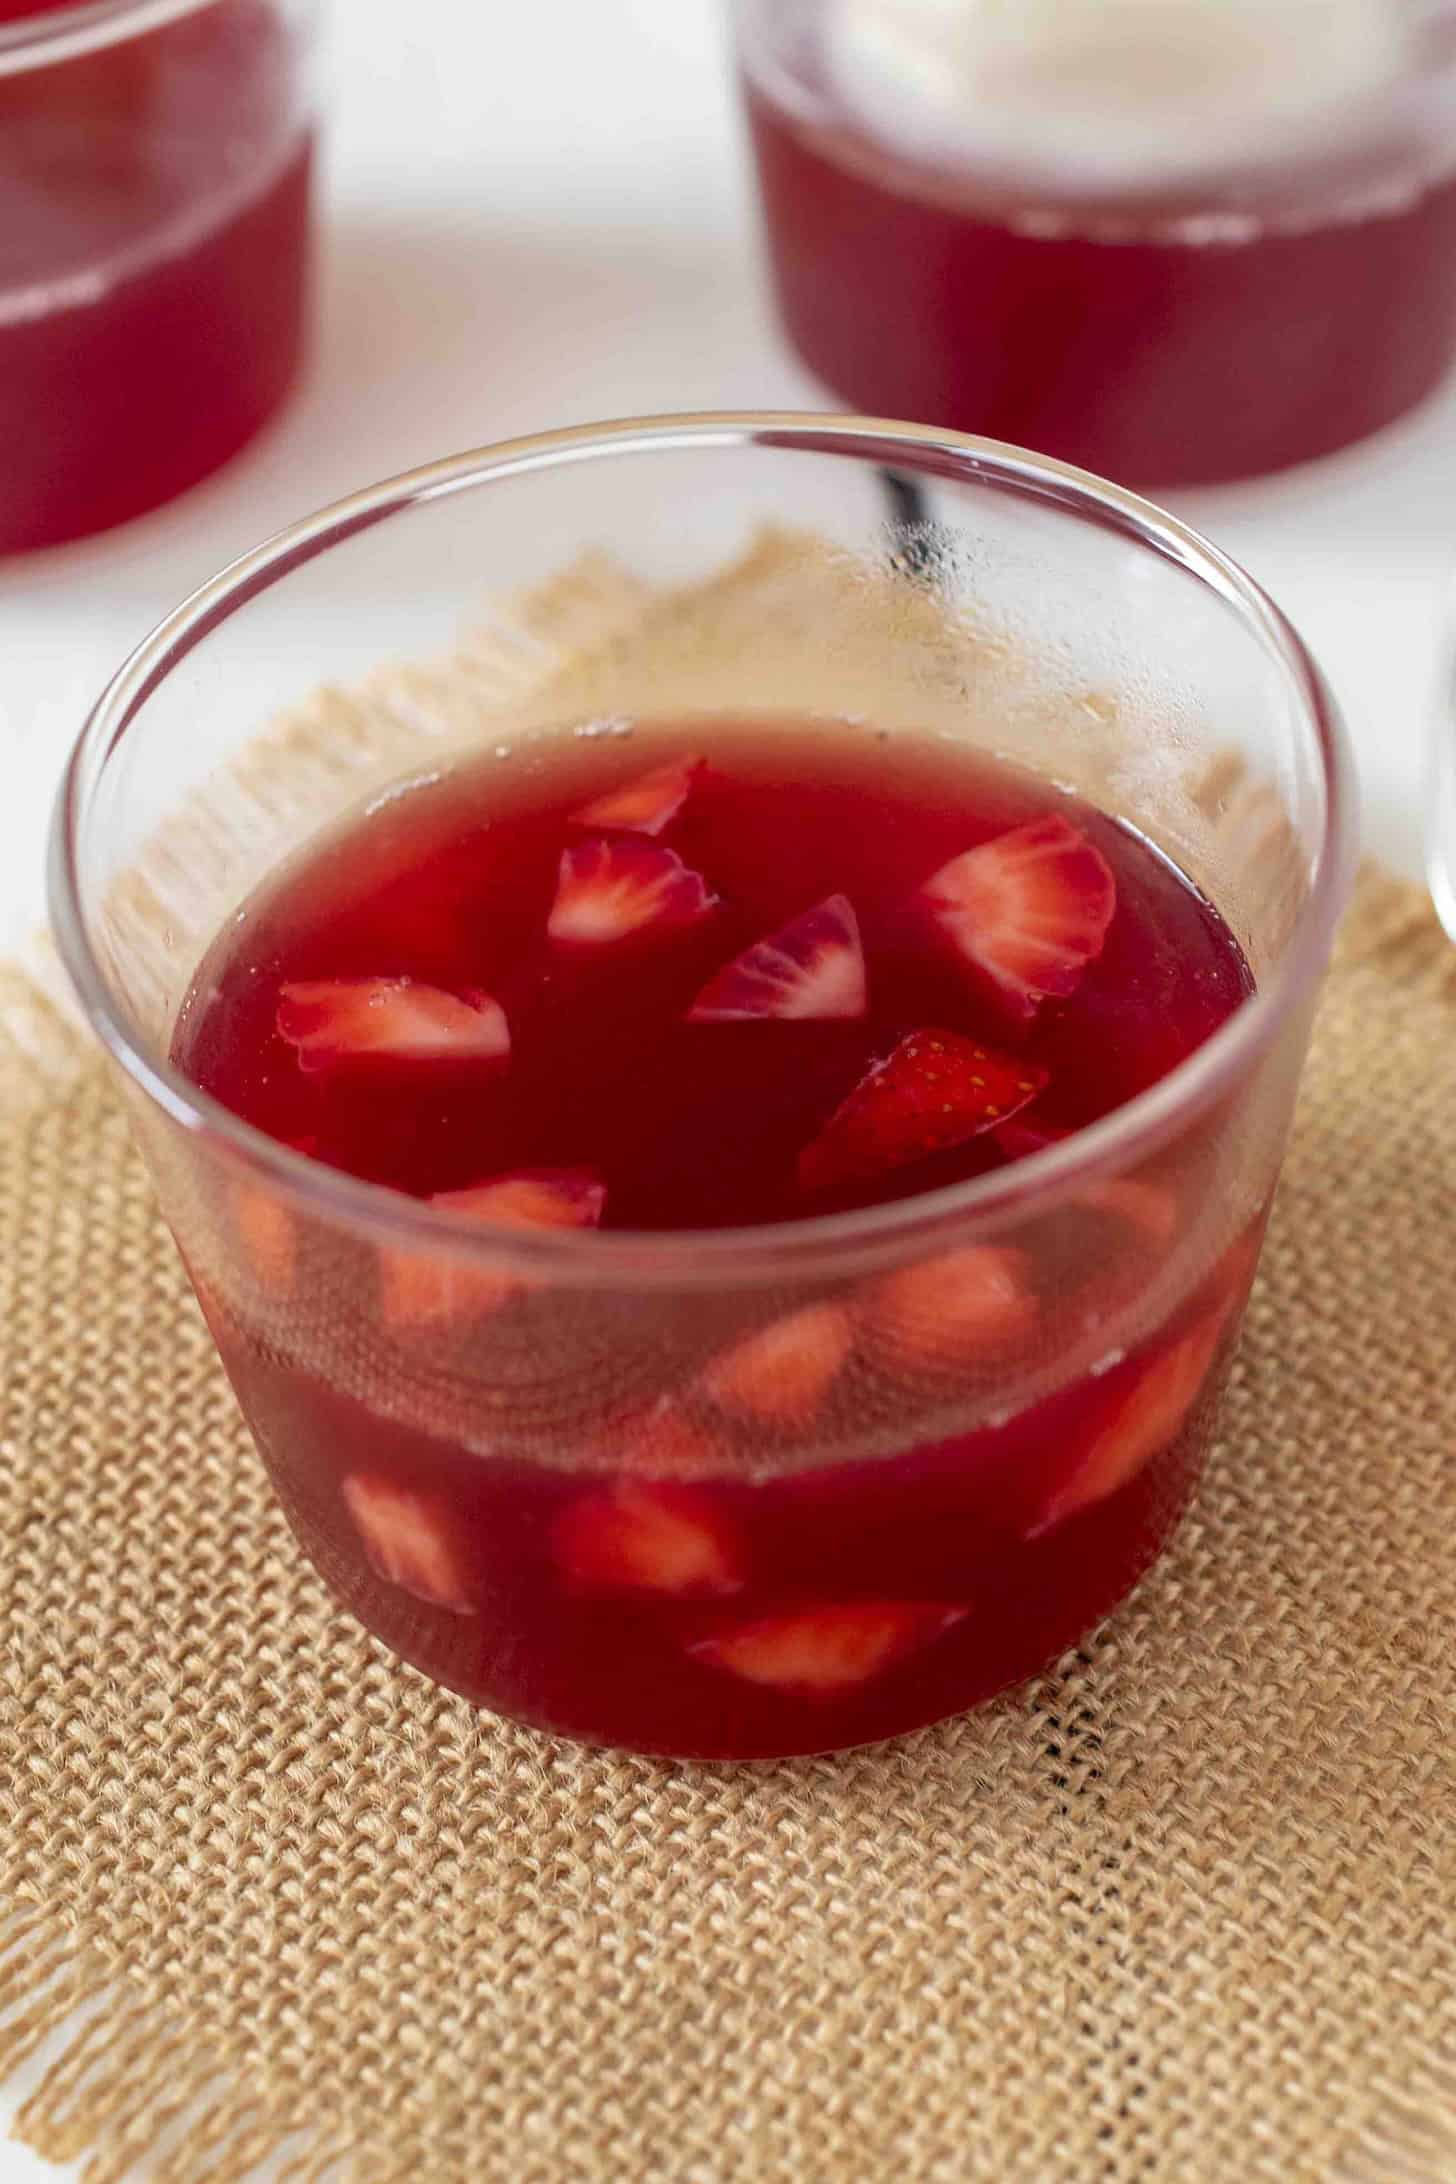
Pouring your scratch-made mixture directly into individual glass dessert cups makes entertaining so much easier. Not only does it save you the stress of unmolding a giant mold, but the clear glass beautifully showcases the brilliant color. For an extra special touch, you can even drop a few finely chopped strawberries into the cups before the jelly sets (see picture below). When you are ready to serve, simply top each glass with vanilla ice cream. - The Traditional Way: Scooped into Bowls:
The classic way is to serve this was to set the jelly in a large glass baking dish or a big bowl. To serve, scoop a generous portion into individual bowls and vanilla ice cream alongside.
Gelatin vs. Gelatine: What’s in a Name?
Depending on where you are reading this from, you might notice the spelling looks a little different! In the US, it is universally spelled gelatin (without the “e”). However, if you are baking along in the UK, Australia, or New Zealand, you will see it written as gelatine.
3-Ingredient Jelly/Jello
You only need three simple ingredients to create a dessert that tastes like pure summer:
- Fresh Strawberries: The absolute star of the show. Blending real, juicy strawberries gives bright fruit flavor and a beautiful natural color.
- Sugar: Just a touch to balance the tartness of the berries and bring out their natural sweetness.
- Gelatin Powder: The secret to getting that perfect, signature classic wobble.
Tips for Success
While it is an incredibly straightforward recipe, a few quick insider tips will give you the absolute best texture and flavor:
- The Temperature Trick: After setting in the fridge, allow it to sit on the counter for just a few minutes before serving. Serving it slightly softened allows it to melt beautifully into the cold ice cream.
- Fun Molds: If you do ever want to go full old-school party style, you can always pour your strawberry mixture into a fun vintage decorative mold to set instead of using glasses.
Naturally Sweetened and Low-Glycemic Options
If you are skipping refined white sugar, you can still get that perfect, sweet strawberry flavor without sacrificing the texture. Gelatin binds beautifully with natural, unrefined sugar alternatives! Here are the best swaps to fit your dietary needs:
- Monk Fruit Blend: An excellent keto-friendly, zero-glycemic choice. Look for a cup-for-cup sugar replacement blend (like a monk fruit and allulose mix) to keep the texture completely smooth without any cooling aftertaste.
- Honey or Agave Nectar: For a completely unrefined, whole-food option, honey or agave works beautifully. Because they are liquids, start with slightly less than the recipe calls for, taste your warm strawberry mixture, and adjust to your preferred sweetness.
- Pure Maple Syrup: Another fantastic unrefined option that pairs surprisingly well with strawberries. It adds a subtle warmth that makes it feel extra gourmet.
- No Sugar Added (Fruit Juice Sweetened): If you want to rely entirely on the sweetness of the fruit, you can swap out the water in the recipe for a splash of 100% apple juice or white grape juice to naturally sweeten the strawberry puree.
A Retro Mashup: A Knickerbocker Glory Upgrade
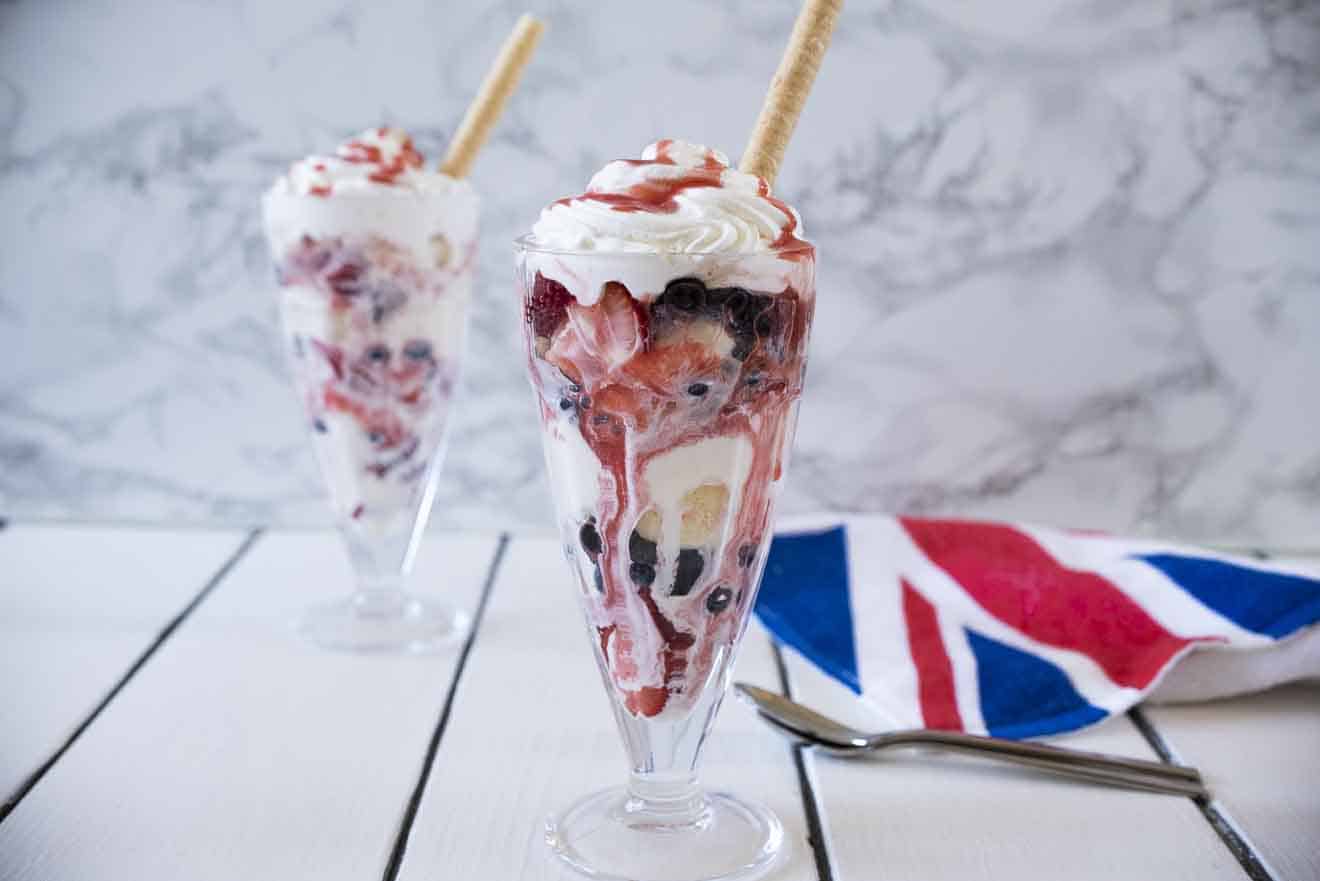
If you want to take this from a casual throwback to a showstopping showpiece, you can easily transform it into a classic British Knickerbocker Glory. This is the ultimate retro sundae layered in a tall glass. By simply adding a thick layer of your homemade fruit jelly to the bottom, you create the perfect, vibrant base for scoops of ice cream, fresh fruit, fruit syrup, and a mountain of whipped cream.
British Jelly and Ice Cream (A Classic Retro Dessert)
Video
Ingredients
- 1 pound (453 grams) ripe strawberries, chopped (The redder the strawberries, the more vibrant your jelly will be. You can also use store-bought strawberry juice, chilled).
- 3 tablespoon granulated sugar, or your preferred natural alternative
- 1 cup (236 ml) water
- 2 tablespoons (25 grams) unflavored gelatin powder
- Vanilla ice cream, for serving
Instructions
Extract the Strawberry Sauce:
(Skip this step if you are using store-bought juice and head straight to Step 5)
- Add the chopped strawberries, sugar, and water to a saucepan over medium heat. Bring to a light bubble for about a minute, mashing the berries with a fork or potato masher as they soften to release as much juice as possible. Turn off the heat and allow the mixture to cool slightly right in the pan. Taste the liquid for sweetness – if you prefer it sweeter, add a touch more sugar now while the liquid is warm so it dissolves easily.
- Strain the mixture through a fine-mesh sieve into a bowl, pressing firmly on the fruit pulp to extract every last drop of glorious liquid. You want exactly 2 cups (472 ml) of strawberry juice. If you come up a little short, simply top it up with a splash of water or store-bought fruit juice. (Don't throw away that leftover fruit pulp – it makes a tasty snack over yogurt).
- Give your saucepan a quick rinse and clean, as you will need it again shortly.
Chill the Juice
- Skim any foam off the top of your strained juice, then place the bowl in the refrigerator for about 1 hour until cold. The ideal temperature for gelatin to bloom is between 35°F and 40°F (2°C to 4°C). If you are in a rush, you can pop it in the freezer for about 30 minutes – just keep a close eye on it so it doesn't actually freeze.
Bloom the Gelatin:
- Once your strawberry juice is chilled, evenly sprinkle the gelatin powder over the top of the liquid. Let it stand undisturbed for about 5 minutes to absorb the liquid. This process is called blooming. The surface will start to look wrinkly and lumpy – don’t worry, this is completely normal.
- Pour the bloomed liquid back into your clean saucepan over low heat to dissolve and activate the gelatin. Gently warm the liquid until it reaches between 120°F and 140°F (50°C to 60°C). You will know it is ready when the liquid is completely smooth and syrupy again.
- Once all the powder has dissolved, remove the pan from the heat. Divide the mixture evenly between 4 glass dessert cups, or pour it all into an 8 x 8-inch (20 x 20 cm) glass baking dish. Refrigerate until completely set, which takes about 2 to 4 hours.
- To serve: Add a spoonful of vanilla ice cream right over your individual dessert cups, or scoop the jelly directly from your baking dish into bowls alongside the ice cream.